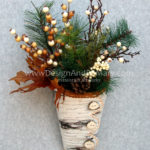
 It’s certainly been a bit since I’ve last posted anything. It seems that life sometimes insists on taking its own course. While I do intend to get back to at least occasional blogging, I have decided to post this tutorial that I have long been meaning to share. It seems especially significant since I’ve just listed a new pattern for a wall pocket http://www.designandbemary.com/products/wall-pocket/ This pattern can be done using either the faux birch bark technique or simple plain wool with applique. I’ve actually experimented with several projects in the faux birch bark technique and it certainly is a fun ‘diversion’ from so much of regular wool work AND it has the added plus of being done on the sewing machine; a real plus if you’re not a huge fan of hand applique! You will also enjoy it if you have had even a passing interest in basketry techniques as the sewing and construction methods have some similarities. I will caution that working with the heavier materials involved may prove to be somewhat more challenging if you are so unfortunate to have to deal with arthritic hands, etc.
Creating the material that will fool the eye is not all that difficult and is, in fact, a rather forgiving process. Living here in Minnesota, the beauty of birch bark conjures up the comfort of a northwoods cabin or lodge, an exquisite skill of native lives, the brilliant flash of white in among the deep green pine woods, and even the smell of burning birch logs. However, it is not that easy to find good materials to work with should you decide to try your own hand at a birch bark project. Therein lies the challenge that I set out to solve for myself. No…faux birch bark will never replace the real thing, but it sure is fun to fool the eye! So here’s the technique I have worked to create over the last 2 years.
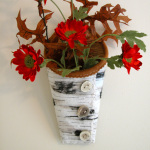
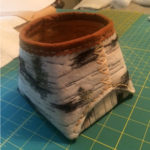
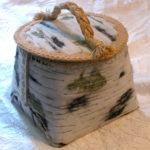
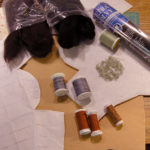
The top row of photos show some of my first ‘experiments.’ You can use your faux birch bark to create any project you so desire. I decided to publish a wall pocket first – others may be following. Regardless of the project, the process of making your birch bark is essentially the same. The second row of photos show the materials needed to proceed. Please note that these photos show the construction of a basket – but all steps are basically the same in creating your bark.
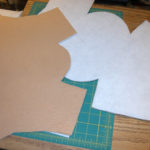
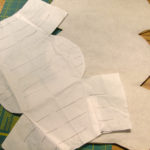
You will need 2 colors of wool felt (I used National NonWovens wool/rayon blend felt(very important to wash, dry and steam press/block before using) in colors that I thought best imitated the colors of birch bark – antique white and champagne). You will also need a very heavy, stiff double sided interfacing such as Peltex 72; freezer paper to trace, draw, and determine folding lines; regular sewing thread in a cinnamon or nutmeg color (for the inside ‘lines’ of the bark) and I used Superior’s King Tut quilting thread in a variegated black to white coloration for the outside lines on the bark; some ultra Solvy water soluble stabilizer and light sage green thread if you want to make ‘lichens’ for your bark; and small amounts of wool roving in blacks and browns to add to the character of your bark. You can see in the third photo how I played with the freezer paper to fold and adjust my pattern, plus it allowed me to draw some lines that showed the direction of the stitching lines – including some curving that allows for better visual appeal when your project is sewn together. In the case of the basket you can see this gentle curving on each end of the paper pattern. [One more optional thing you may want to use – and it is not pictured in the supplies photo – is some good quality colored pencils in gray, brown, rust, and black – see photo at bottom.]
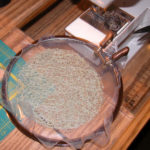
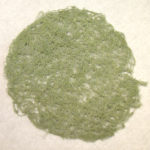
You may also want to make some of those colorful ‘lichens’ to enhance the beauty of your bark. As shown in the photos above, you can see the water soluble Solvy hooped and ready to be the base for some thread work. I used a pale green/gray thread in both the bobbing and top of my machine, dropped the feed dogs and set the stitch a bit longer than normal. I then just kept moving the hoop around and stitched like a crazy person, going back over and ‘scribbling’ the thread interlocking it as much as possible. There are no real ways of blowing this part, but do make sure that you create a fairly thick mat and that the threads are passing and crossing over each other. When done, soak the piece in water (as per instructions on the Solvy) and when the Solvy is gone, press your sheet of thread/lichen dry. It is now ready to be cut in small pieces and sewn in as you machine stitch your birch bark line texture in.
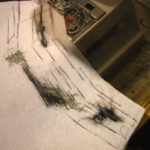
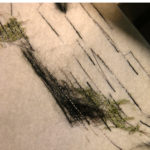
Put your wool felt patterns pieces together: champagne color on the bottom, stiff fusible in the center, and antique white on top. (I always try to allow an extra 1/4″- 1/2″ inch around the perimeter of the actual pattern – this will be trimmed off when I am done stitching.) Fuse with hot iron. Thread your machine with the cinnamon thread color in the bobbin and the black/white variegated in the top needle. I use a fairly small stitch. You can decided whether of not to drop your feed dogs – I found I preferred not to drop them, but I did release some of the foot pressure enough so that I could somewhat slide my fabric back and forth underneath the sewing foot. As shown in the photo begin stitching in a random manner but following the general direction of the lines you had penciled in on your paper pattern. Skip some distances and go back and forth over others. Don;t worry about the ‘connecting’ threads. This IS a messy looking process! As you stitch, cut pieces of your ‘lichen’ and stitch right over it, back and forth to catch it in enough to hold it secure; you can also take very tiny (believe me you don’t need much!) amounts of wool roving and catch this in the stitching. i tend to work about an inch wide band of stitching from one side to the other – then turn the piece around and go back in about another inch width. Be fearless!
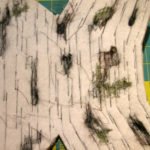
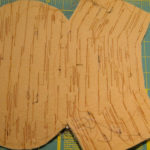
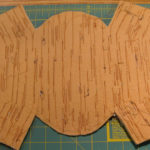
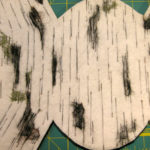
In the photos above you can see that your birch bark fabric will be rather messy looking with all the connecting threads, etc. (Its kind of fun to sew without stopping to clip threads!) Once you have covered your fabric with stitching, you can start to trim and clip the threads on both sides. Don’t worry if some of the end/beginning stitches on your bark kind of pop out when you are trimming the threads. Birch bark is kind of ‘rough and gnarly’ so this just adds to the faux look. I also go back and pull on any roving that I stitched in – pulling out any extra that didn’t quite get stitched down enough. You can save any small amounts you pull out for future projects. Once you get the threads trimmed on both sides, you will be amazed at the bark you have created! Take a look at those photos!
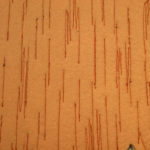
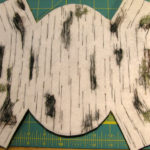
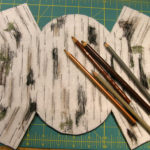
These first of these last two photos show the finished stitched and trimmed top of the birch bark fabric. The second photo shows what adding a bit of coloring with colored pencils can do to make for a more authentic birch bark appearance. Since these projects are generally not being washed, etc, color pencils work great – use them gently and don’t be afraid to blend them. Most people don’t even realize that you have used them – they just think it’s birch bark!
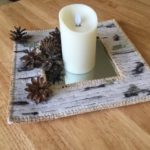
Once you have created your birch bark fabric you can create anything you want! So go ahead, have some fun and see if you can ‘fake ’em out’!!!

thank you so much for sharing this technique!
You’re welcome! Warning: it’s addictive!!! 🙂