If you are like me, you are smiling with great satisfaction (maybe even relief!) that you now have completed 98% of the preparation in order to begin the fun of stitching together the Fall Leaves topper! It is a lot of cutting, but makes the rest of the construction go much smoother and faster. Since I tend to be a bit of a clutter bug, I have to find ways to prevent myself from misplacing and ‘losing’ things: so I have found it helpful to store any cut out appliques (that are not in any immediate use) in a plastic folder and/or envelopes.
(I know, why not just be less ‘cluttery’? Let’s just say that’s not likely to happen! I think I’m one of those people who is creatively stimulated by a cacophony of materials laying around!! Every time I’ve tried the clean and neat approach, I end up spending frustrating hours – if not days – looking for what I knew ‘was right there’!!!) Anyway, I also store the freezer paper templates for the appliques (after I remove them from the wool); that way they are available should I accidentally lose a piece or if I want to make a second topper.
LAYING OUT THE FIRST APPLIQUES
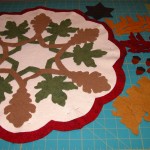
Remove the freezer paper from the oak leaf and maple leaf ‘snowflake’ appliques, as well as the brown center star applique. Do this gently so as not to create distortion in the wool. By the way, if you take a close look, you will see that I used wool felt for the maple leaves (green) and I used a coating weight felted wool for the oak leaves. I have had no issues with mixing the two types of fabric, but do consider that felted wools all felt a bit differently and a ‘looser’ felt may not work as well for smaller applique pieces. Some wool workers use a fusible backing to deal with this, but then have to stitch through the fusible. Lay out the two appliques on top of the cream and red background, carefully centering and adjusting for placement. I use the center star applique to help with this process as the points on the star help to guide the placement. Pin very lightly.
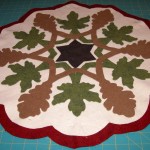
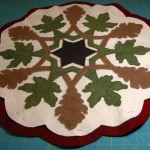
Oak leaf, maple leaf , and center star applique laid out, lightly pinned. Note that the oak leaf applique is placed OVER the maple leaf applique.
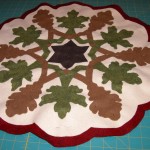
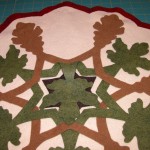
Oak leaf and maple leaf appliques shown laid out, but ‘woven’ together, alternating the two leaves – in a one above, one behind fashion
At this point, you can choose to leave the two leaf appliques – on on top of the other – or you can ‘weave’ them together as shown in the pattern cover picture. The center picture here shows the leaf appliques laid out in a woven fashion, while the picture on the right shows how to ‘weave’ them – with a minimum of disruption to the placement and centering you already did. Simply unpin every other maple leaf and fold each leaf, one at a time, back toward the center; then fold each leaf back over the oak leaf applique, crossing over and on top of the ‘connecting stem’ part of the oak leaf applique. Which ever layout you choose, pin the appliques in place, ready for stitching.
THOUGHTS ON PINNING VS.BASTING
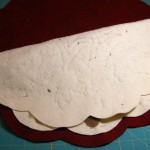
I have been asked why I choose to use pinning, vs. basting. I like to keep all the ‘layers’ (including background/bases) pinned in place in order to reduce the amount of distortion (stretching, give, etc.) that naturally occurs over time while working with the piece. (This ‘give’ is simply part of the quality of wool – and can be a very useful quality!) I also like to be able to get my hands between layers for ease in stitching. By pinning, I can simply unpin one background area at a time, stitch – removing the pins from the applique as I work – then re-pin the backgrounds together before moving on to the next applique section. Basting would prevent this process. While it seems like a lot of pinning, experience has shown me I that keeping the wool background bases stable is helpful later on. I use regular length Iris superfine silk pins. In order to reduce any catching of my stitching thread on the pins, I fold half of the topper back and under itself so the pins will not be a problem. Do what works for you. Consider that in this design, basting would not be conducive to stitching the alternating appliques!
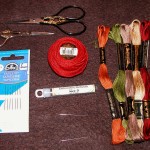
Stitching supplies – scissors with a sharp point, tapestry or embroidery needles, pearl cotton, embroidery threads
STITCHING SUPPLIES
I hand stitch all my toppers. I have been asked about machine stitching, and I see no reason why these toppers could not be completed using some of those fantastic machine stitches available. However, since I have not tried this myself, I cannot speak to the pros and cons. (If you were to complete this pattern using traditional quilting cottons and fusible techniques, machine applique would most definitely be applicable!) As it is, I enjoy hand work. You will see in the picture on the right, some of the materials I use. A small, sharp scissors – that cuts all the way to the tip – is helpful; hide it from the family!! I have 2 favorite types of needles: a size 26 or 28 tapestry needle, which is quite fine, but has a nice long eye and a slightly dull point – the caveat here is that since they are a finer needle, they tend to break/bend frequently – I still like them, primarily because they allow me to make the tinier blanket stitches, so I just make sure to have an extra package on hand. Recently I was given some size 9 embroidery/redwork needles(Jenna Kemball) to try. Somewhat skeptical at what seemed to be a large needle compared to the sz. 26-28 tapestry needles, I have found them to be very nice needles and now use them regularly. They are longer and have a sharper edge, but surprisingly, I can still get a tiny stitch if I want. There are other embroidery needles available and you should use whatever needles work for you and get the desired result.
The majority of stitching is done with either embroidery floss (different numbers of threads will get you different looks) or pearl cotton (most commonly sz. 8). However, there is an incredible assortment of threads available today, many of which would be totally suitable for wool applique. If you have a stash of threads from various other projects, this may be your opportunity to use some of them!
STITCHING
While there are many applique stitches available, the blanket stitch is the most used stitch in my patterns. Since I find that verbal descriptions of stitches are kind of like ‘playing telephone,’ I am hoping that these posted pictures here will be the most helpful to you. (All my patterns have a step by step illustration of the blanket stitch.)
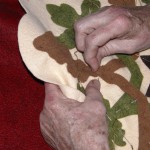
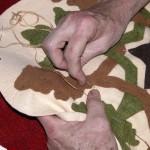
Starting the first blanket stitch on the oak leaf applique. Note my hand underneath the cream colored background/base.
Using a sz. 8 pearl cotton thread – or 2-3 strands of embroidery floss – knot the end. Unpin 1-3 sections of the top cream background from the red outermost background so you can slide your hand between the layers. Insert the needle and bring the thread to the top, next to the edge of the applique. This sets you up to begin the blanket stitch as is shown in the pictures. Complete a inch or two of stitching, then temporarily insert the needle – ‘parking’ it there. Using another needle and thread to match the ‘other’ applique (oak or maple leaf – it doesn’t make a difference which one you start with – the picture shows me starting with the oak leaf) go to the neighboring applique and repeat the process of beginning the blanket stitch. Again, sew for an inch or two, and ‘park’ the needle. Yes, you now have 2 needles going!
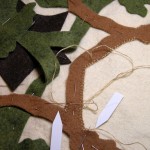
Woven issues! Folding back one applique in order to stitch the other one. Plus the need to have a second needle(for each applique) going in the opposite direction!
Go back and pick up the first needle and proceed to blanket stitch around the first(oak) leaf and over to the same starting point on the next (oak) leaf. At this point, you will realize that because of the woven nature of these appliques, you will need to add 1 more threaded needle to each of the appliques and continue to alternate needle usage to negotiate the applique process. Sounds complicated, but it easily becomes self evident! In the picture on the right, I have placed little arrows showing the two needles used to sew on the oak leaf applique. Notice that because of the nature of the blanket stitch, the two needles will be going in opposite directions. If having 4 needles going at one time doesn’t work for you, you can 1)consider removing the needle, leaving the thread, and then re-threading when you need to use that needle OR 2) continually ending and knotting off the thread for each section.
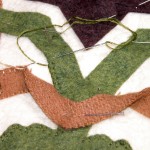
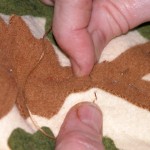
Solution! Fold back the upper applique, stitch the one underneath! Replace top applique to original position.
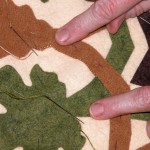
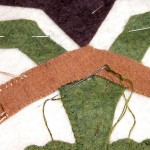
It will not be long before you realize that you can not stitch too far on one applique before you run into ‘cross over’ area with the other applique! All you need to do is simply unpin the applique area on top, temporarily fold it back, and stitch the applique that is on the bottom; then unfold and re-pin/or stitch the other applique on top. The pictures show this process clearly.
Using these techniques, you will be able to applique the entire oak and maple leaf appliques with a minimum of starts and stops or knots. Remember that as you continue to stitch, remove pins from the appliques you work, but re-pin the background/bases back together as you move on to the next area. You can also applique the center star at this time. Turn the topper over on a large pressing surface and steam press(press, not iron!). I’ve included pictures of what the stitching looks like from the back. Don’t worry if it is a bit messy, as no one will ever see this.
Yippie! The most ‘confusing’ part of this pattern is over! (It would have been much simpler had I not had that crazy idea to weave the two appliques together!!) The next post brings nothing but pure decorative fun!

