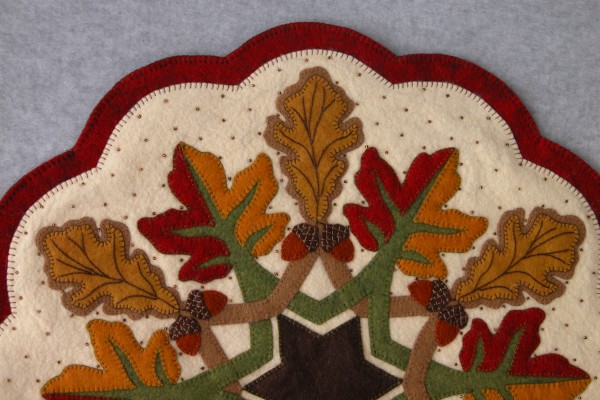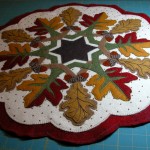
Completely appliqued and beaded top background, now stitched to the outermost (red) background with blanket stitch. All ready for the backing!
Woke up this morning to much more pleasing temps and – even better – reduced humidity! The sun was shining and it felt so good to walk outside and enjoy the fresh air. We took an early morning bike ride around the neighboring regional park; by the numbers of people out walking, roller blading, running, etc. it was evident that everyone seem to be taking advantage of the great weather. Of course, it shouldn’t go without saying – the predictions are for returning higher temps and uncomfortable humidity levels. 🙁 For the moment though, it feels wonderful just to know I can walk out my door and not wilt!! Not surprisingly, I felt more energized and was encouraged to get this final post done for the Fall Leaves series. With the background beading done, the project really is in its ‘home run stretch.’ I find I usually get pretty excited once the background beading is done; all the hours of applique and embroidery are done and the beaded background just adds something special. With only the backing left to do – it’s kind of like putting ice cream on the cake: the final finishing just makes it even better!
CREATING AN EVEN OUTER EDGE/MARGIN
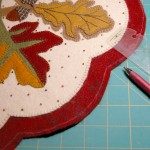
Using a ruler and fabric marking pen to measure and trim the outermost backing(red) edge to evenly match the (cream) top background edge, creating a uniform margin.
After stitching the beaded top background (cream) to the outermost background (red), be sure to steam press from the back and let cool. If I haven’t mentioned it before, it helps if you can do this pressing on surface large enough for the whole topper as it helps control the amount of distortion and stretching that can occur. Looking at your top, you likely will likely notice that the red margin around the outer edge is not an even one. As I have said before – wool moves – and with my construction techniques, I have yet to find a suitable way to guarantee a nice even edge without this final measuring and trimming. However, the hidden advantage to this final measuring/trimming step, is that you can choose the width of your margin. Most of my patterns are designed with a generous margin – better to have too much than not enough! Using a fairly flat ruler (transparency is a plus – mine came from a old daybook (you know… before Iphones, Ipads, etc!!) and a fabric marker, I simply lay the ruler perpendicular to the edge of the (cream) top and mark the chosen distance on the (red) background. Since you are measuring around curves, be sure you keep the ruler perpendicular to the point where you are measuring. If measuring seems tedious to you and you have a really good eye, you may be able to ‘eyeball’ and mark even margins without the ruler. Mark an even margin all around the topper. Do not cut yet.
APPLYING THE FUSIBLE FOR THE BACKING
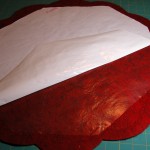
View of the backside showing the placement and application of a paper backed light weight fusible – in this case Heat N Bond.
Turn the topper over on your pressing surface, back side facing up. Using a light weight paper backed fusible of your choice (I have used Heat N Bond), I lay the fusible over the piece and cut out a piece that is roughly 1 1/2″ – 2″ smaller than the topper. I say roughly because the placement is really not very fussy. The main purpose of the fusible is to adhere the backing wool felt to the front as I have found this creates a nice firm and stable topper. However, you do not want to have fusible all the way out to the edges where you will be doing your blanket stitch (or any other edge stitch!) as this would make stitching more difficult. I regularly use small left over pieces of fusible to fill in some of the ‘points’ and curves on the back. Once the fusible is cut out, follow manufacturer’s directions for fusing; just remember that fusing to felt may take a bit more time or heat! Let cool and peel off the paper.
FUSING THE BACKING AND FINAL TRIMMING

The top (with fusible on the back) laid out and pinned to the backing wool – ready to be turned and pressed which will complete the fusing process.
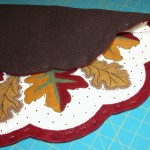
Folded view of the front and back showing the fused ‘sandwich’ – with perfectly match edges – pinned and ready for final stitching!
Lay out your backing wool or wool felt, wrong side up, on a large enough surface so you won’t have to move your piece while pinning the backing to the top. Place the appliqued top (with the fusible on the back) – on top of the backing – right side up. (The two pieces should be wrong sides together.) Heavily pin all around the edges of the margin – fairly close to the outside edge (the line you drew when you measured.) Carefully turn over the entire piece onto a suitable pressing surface, so that the back side is now on top. With a hot iron, proceed to fuse the backing to the top. Do not remove the pins yet: they will be helpful when you both cut and then stitch around the outside edge. Let the top cool. Once more flip the entire top over so that it is right side up. While keeping the piece laying fairly flat, use a sharp scissors and cut through both the top and backing layers on the line you drew for an even edge/margin. This will mean your edges will be trimmed to exactly match each other. [You may notice that the center photo above shows the top(red) edge already trimmed to an even margin. It is perfectly fine if you choose to do this separately; you just have to be a bit more careful when cutting the backing in order to get really flush, even edges. When I first started making my pattern samples, I actually did many of them by trimming the top first, only to later discover that it was easier and made for a nicer edge to just cut the two layers together as I have described.]
THE FINAL STITCHING
The picture on the right above, shows the backing wool, fused to the top, pinned around the edges and ready for the edge stitching of your choice. I use blanket stitching, hiding all the knots – starts and stops – in the center thickness of the wool felt layers. I have always hated ‘messy’ backs, knots that show, etc. so I work my darndest to hide those things. I do have two hints regarding blanket stitching the edge. 1) Choosing to use a contrasting thread will make your stitches stand out, so if you find yourself struggling with consistency, use a similar colored thread and any uneven stitches will blend in with the background. 2) Unlike the top applique areas of blanket stitch where your needle might not have gone totally through the ‘bottom’ piece of wool, this is one place where you’ll want to see the full blanket stitch on the backside as much as on the top side. I have found the best way to achieve that is to hold the area you are stitching parallel to the ‘ground’ or horizon – then place the needle totally perpendicular into the wool layers before pulling through and tightening the stitch. In most traditional sewing arts, we tend to hold our sewing needles at variations of a 45˙ angle. Using that position – especially with the thickness of felt – you will likely end up with larger stitches on the top surface and smaller, irregular ones on the backside. It takes a conscious effort in placing your needle, and a bit of practice, but the final result is worth the effort. As you stitch around the edge, remove the pins as you work.
After completing the blanket stitching around the entire outside edge (all pins should be removed), turn the entire piece over – wrong side up – one last time. Steam press well. Let cool. SMILE WITH SATISFACTION (OK for some it might be relief!) AND ENJOY YOUR ACCOMPLISHMENT! I hope you have enjoyed this series.


